
Disclaimer
On this post I’m basically putting together the instructions from Microsoft and NVidia on how to get CUDA to work on WSL2. There’s nothing special I had to do other than following their instructions. The only issue I faced was that WSL2 and Docker stopped working when I upgraded to the Windows Insider’s build on Windows Home. I had to purchase Windows Pro in order to get WSL2 and Docker working again. This post assumes you already have WSL2 properly installed. If not, follow the instructions here before moving on. Make sure to check the requirements for installing WSL2.
Pre-requisites
Under the risk of stating the obvious, you’ll need a machine with a CUDA-enabled graphics card from NVidia. If, like me, you have a laptop machine, you can check your NVidia graphics card supports CUDA on this page.
You’ll need Windows 10 installed. In theory Windows Home should do, but I had issues with WSL2 and Docker after installing the Windows Insider build for the Home edition and only got it to work again after switching to (purchasing) Windows 10 Pro.
Installation Steps
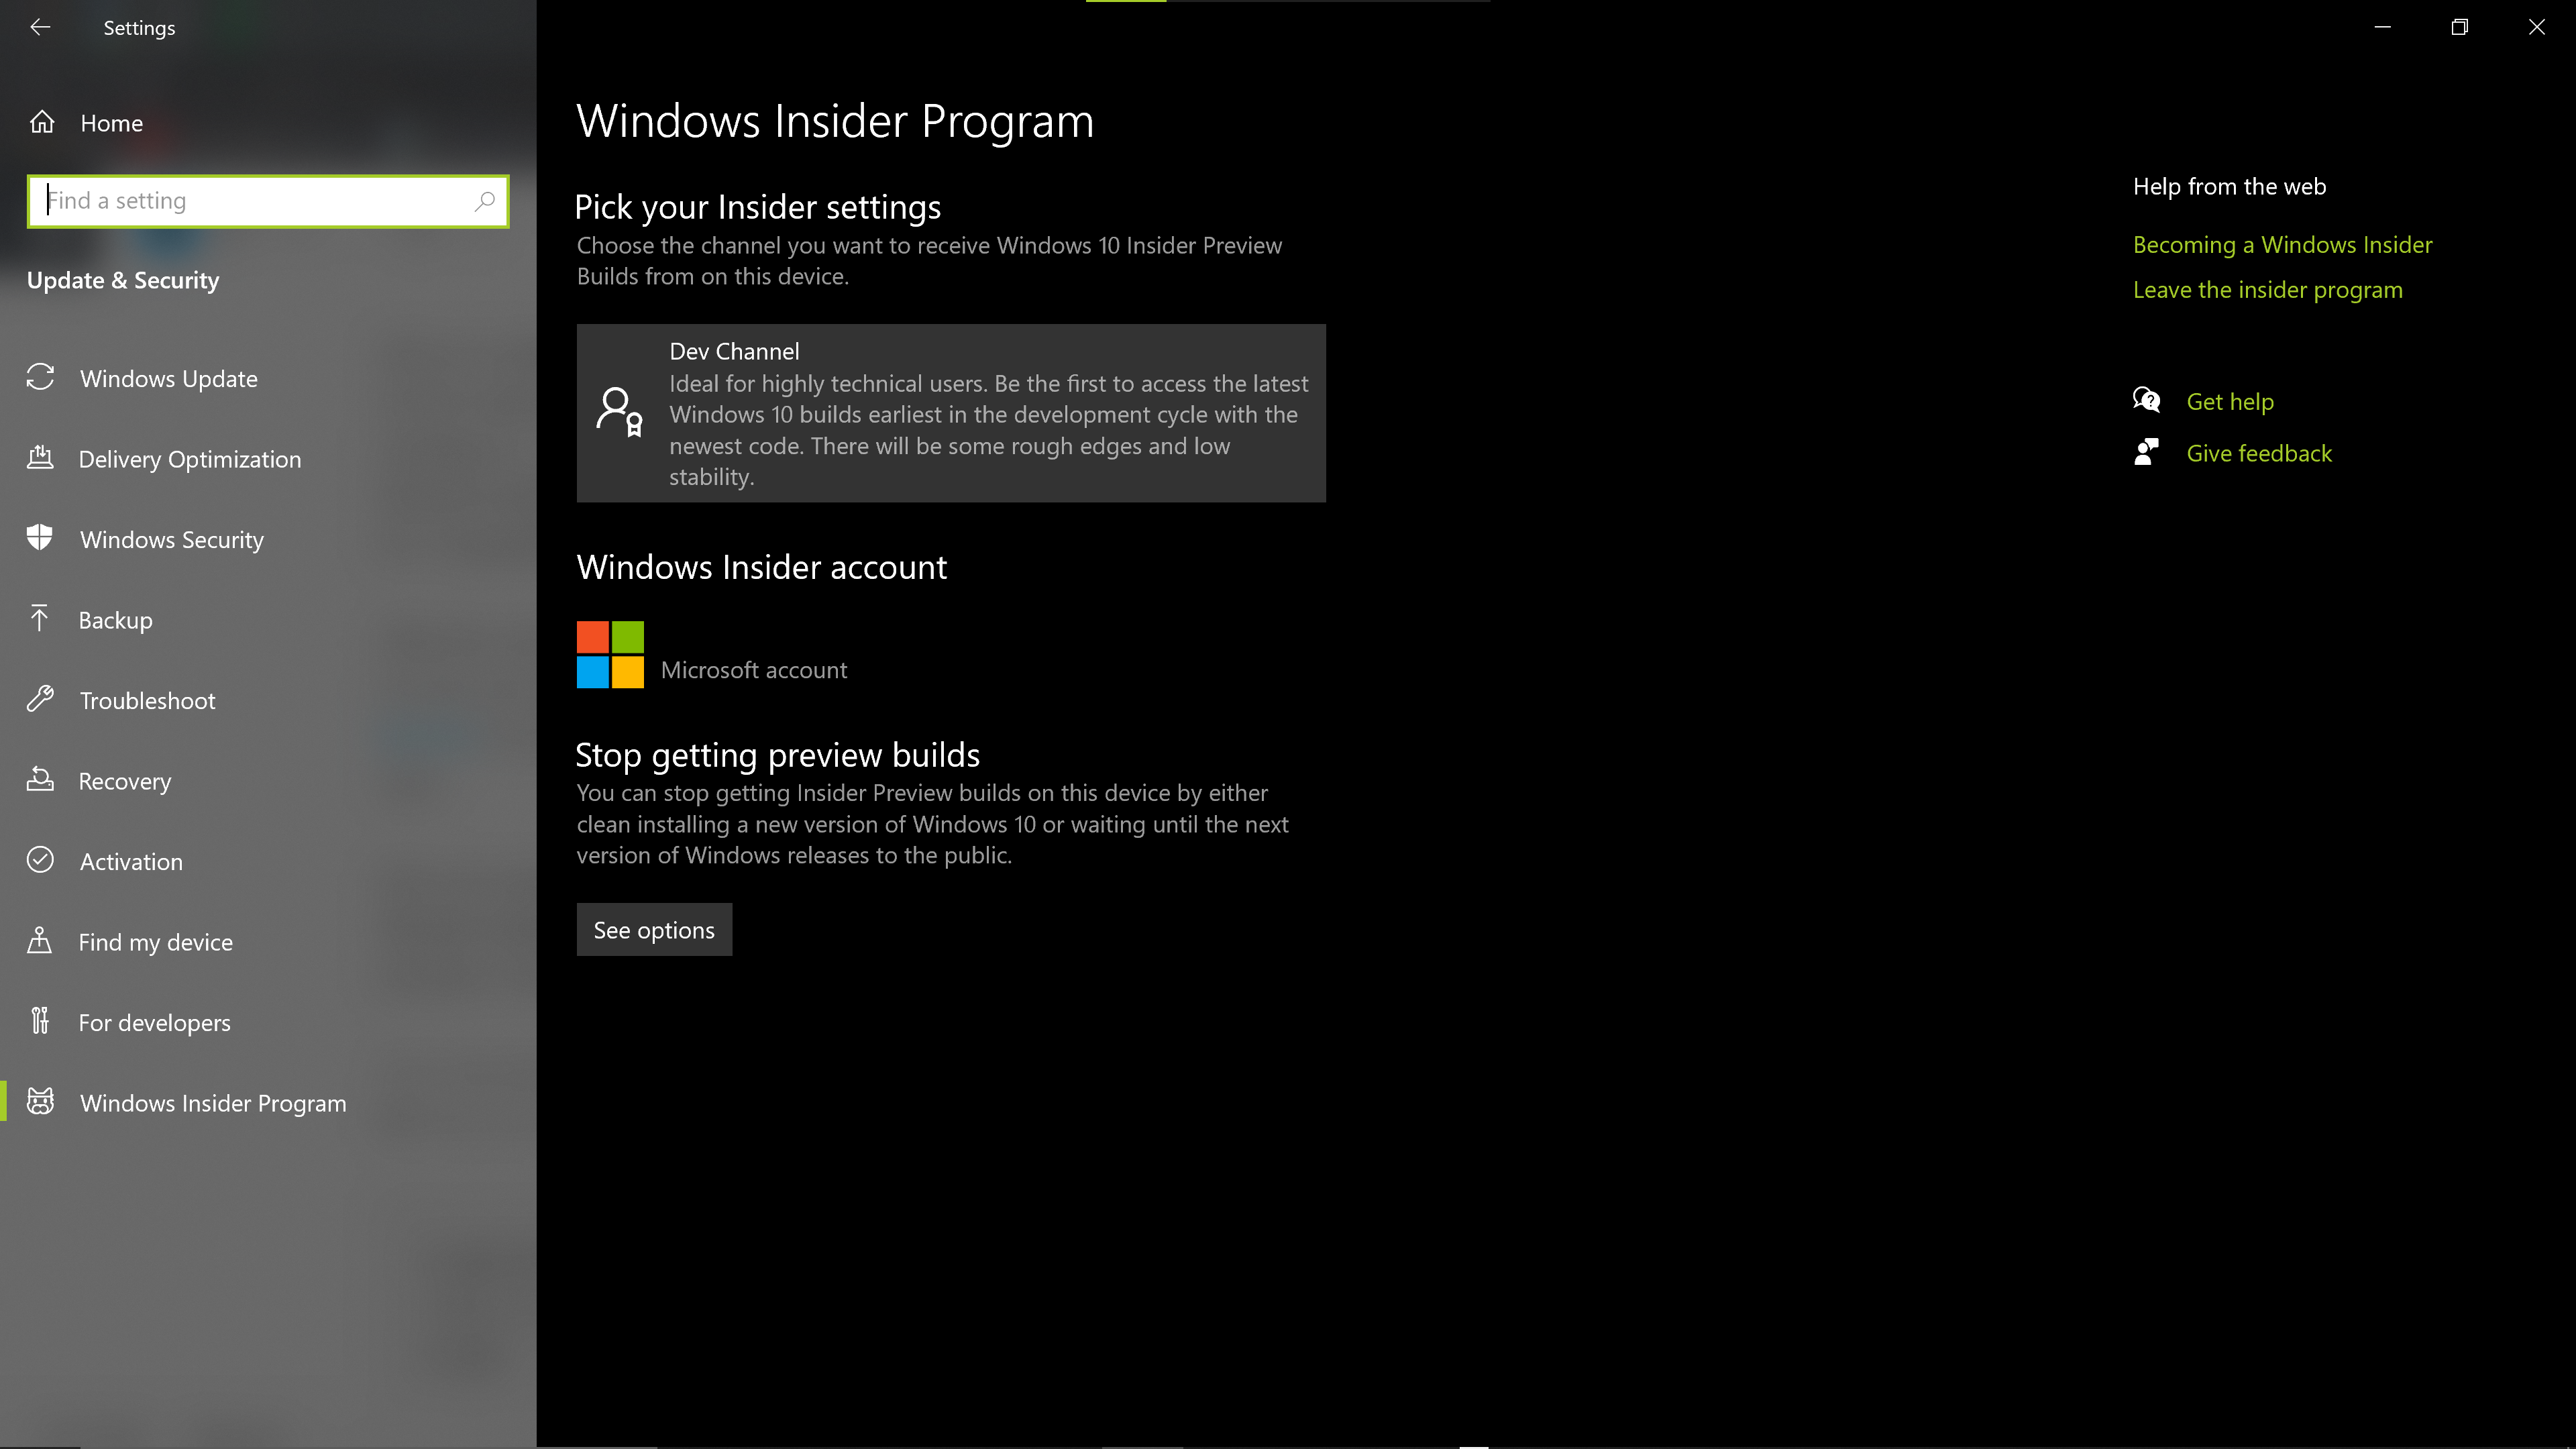
You’ll then need to enroll on the Windows Insider Program. For that, you’ll need to sign up for a Microsoft account in case you don’t already have one.
After you enroll, you’ll need to enable the Windows Insider updates on your machine. For that you’ll need to open the Windows Insider Program settings by searching on the Windows search bar for “Insider”. Next, login with the Microsoft account you used to register on the Windows Insider program and when asked which channel you want to join, make sure to choose the Dev channel. Once you’re done, restart you computer.
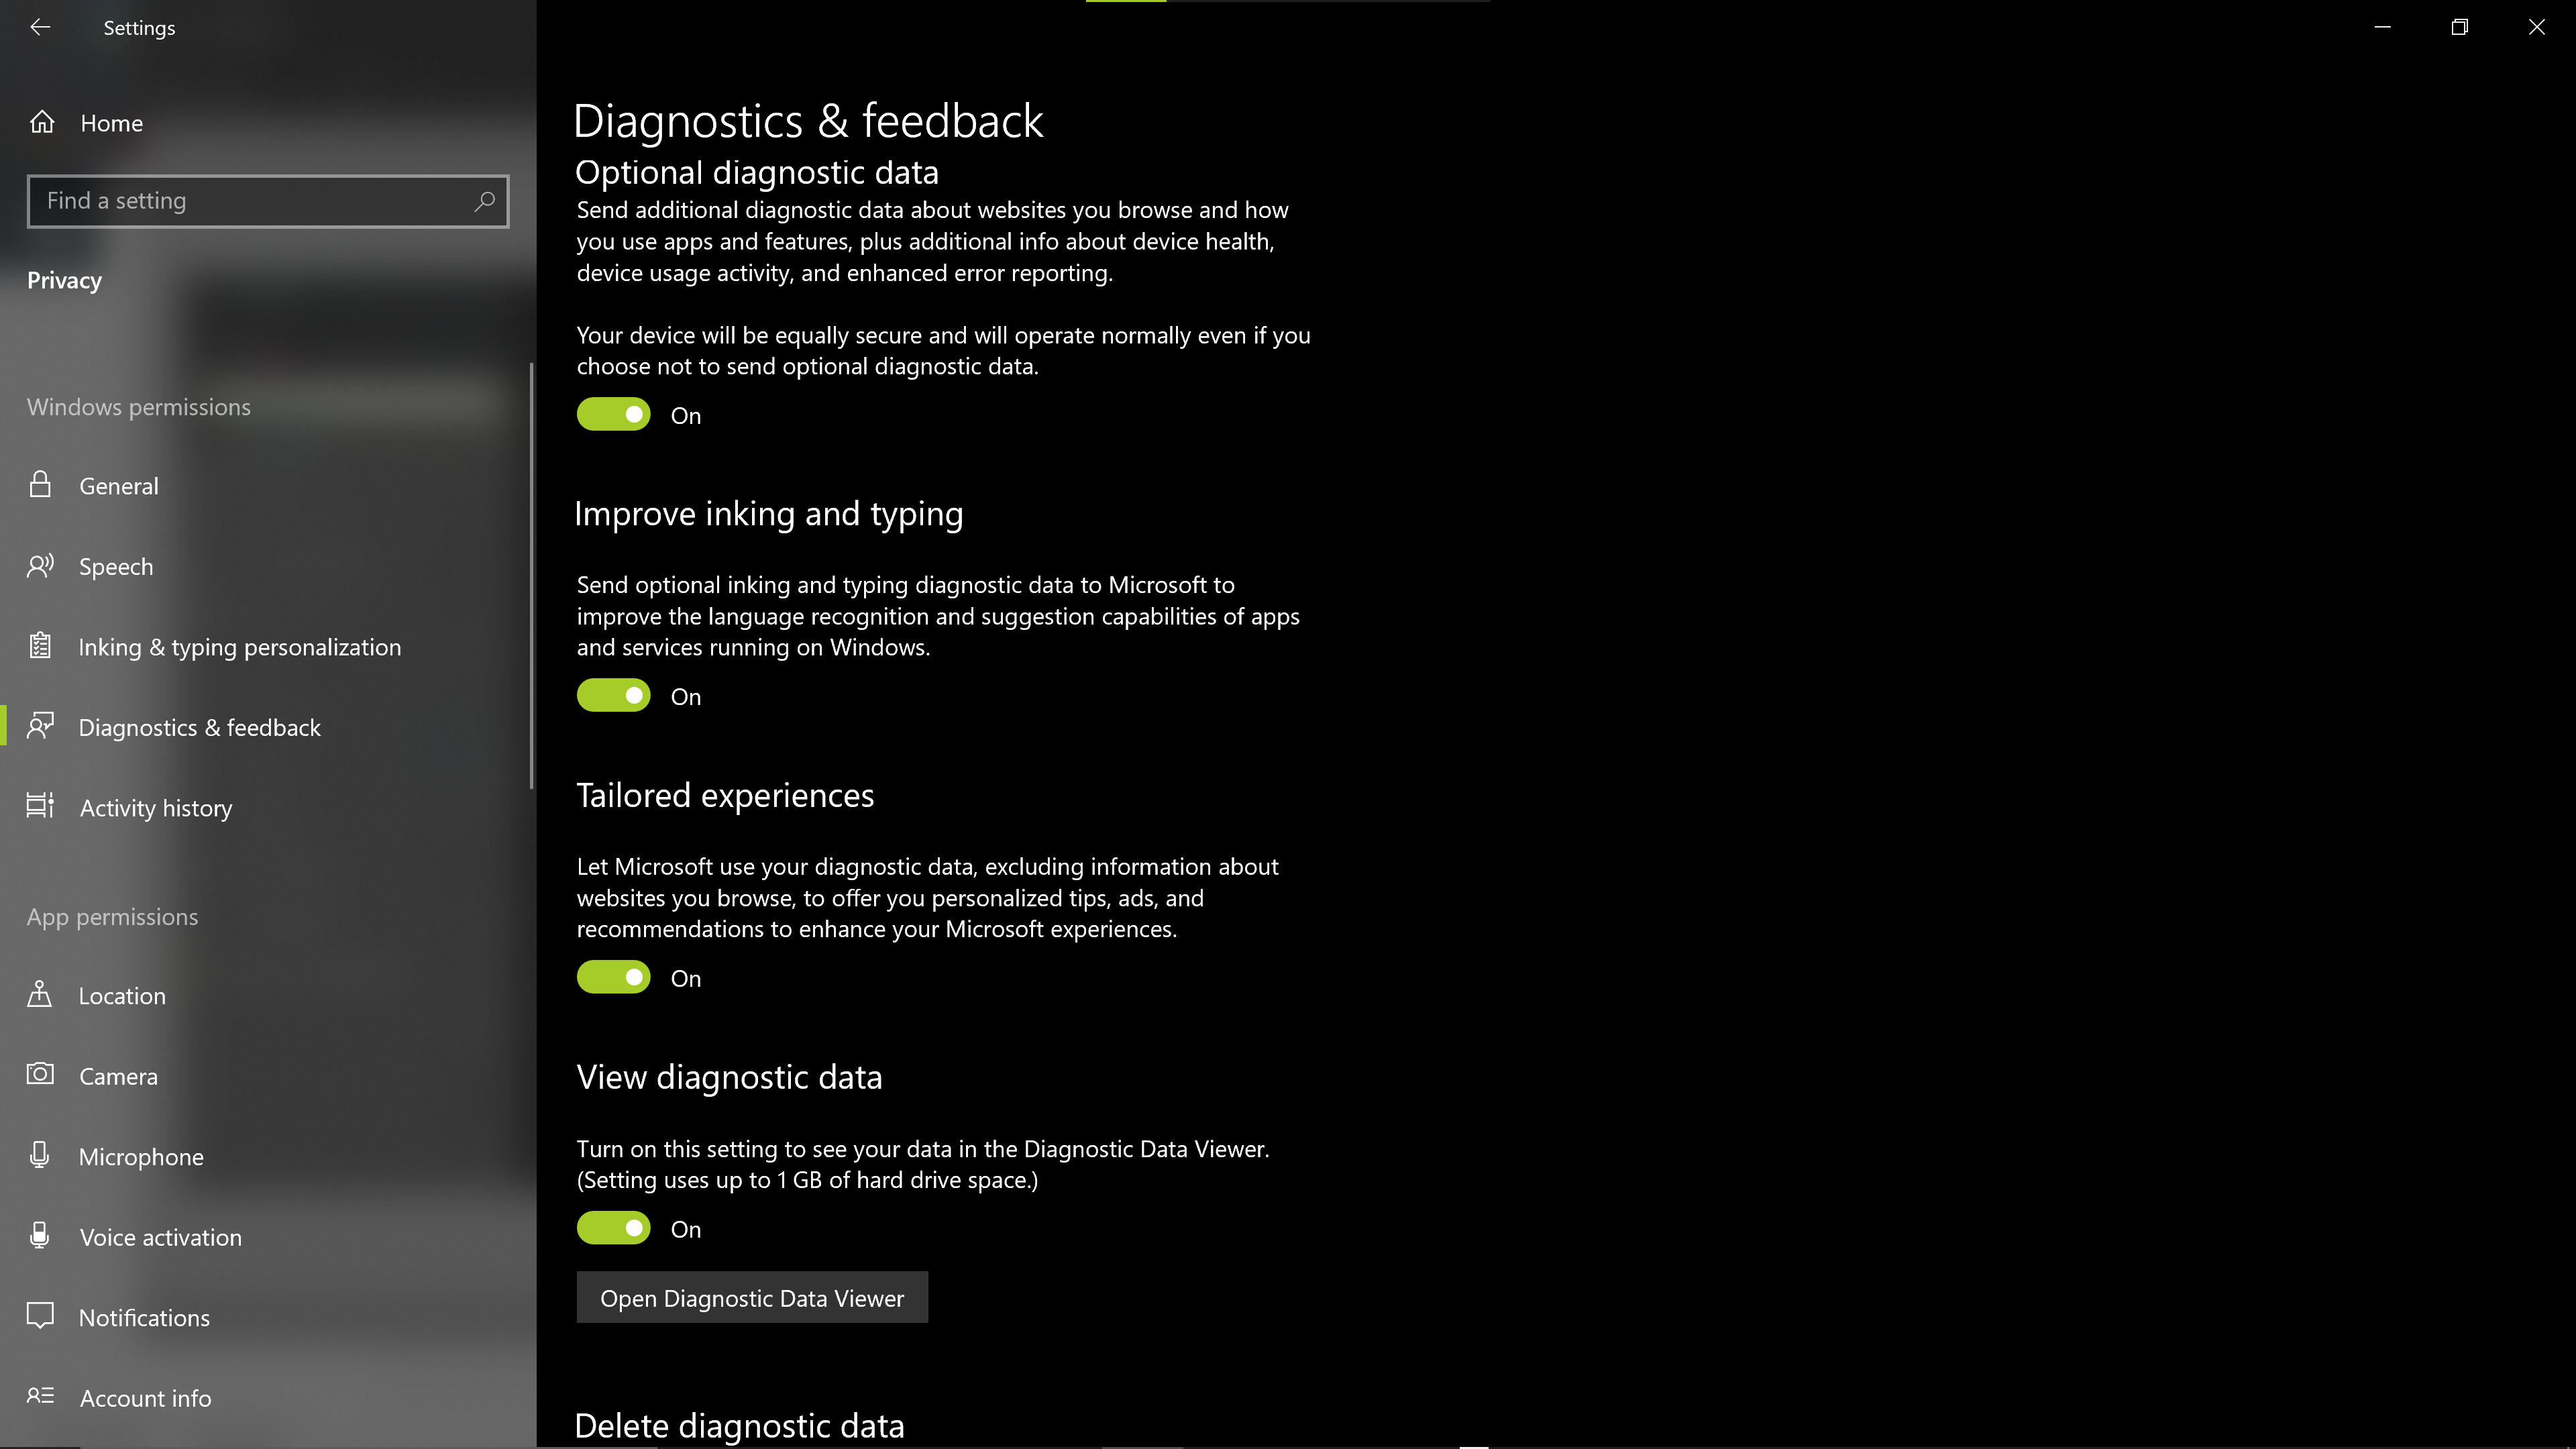
After the computer restarts, you’ll need to configure your data settings to share all your data. I know, it sucks, but what can we nerds do? Wait? No way! You can click here to open the data settings directly. It looks like the most important settings that needs to be turned on is Optional Diagnostics Data.
Now you can finally go to Windows Updates and click on Check for Updates to download the latest Windows Insider build. As expected, your machine should restart multiple times while updating to the latest version.
The next step now is to install the NVidia drivers on your WSL2 Linux distro. If you’re using Ubuntu like me, you can follow the steps below:
$ apt-key adv --fetch-keys http://developer.download.nvidia.com/compute/cuda/repos/ubuntu1804/x86_64/7fa2af80.pub

$ sh -c 'echo "deb http://developer.download.nvidia.com/compute/cuda/repos/ubuntu1804/x86_64 /" > /etc/apt/sources.list.d/cuda.list'

$ apt-get update
Now you can move on to install CUDA. Do not choose the cuda, cuda-11-0, or cuda-drivers meta-packages under WSL 2 since these packages will result in an attempt to install the Linux NVIDIA driver under WSL 2. Instead, just run:
apt-get install -y cuda-toolkit-11-0Now you can build the CUDA samples available under /usr/local/cuda/samples. For example:
$ /usr/local/cuda/samples/0_Simple/matrixMul$ ls
$ Makefile  NsightEclipse.xml  matrixMul.cu  readme.txt
$ /usr/local/cuda/samples/0_Simple/matrixMul$ sudo make
PS: I had to use sudo since my user doesn’t have write permissions under /user/local.
Now you can finally run the sample:
$ /usr/local/cuda/samples/0_Simple/matrixMul$ ls
Makefile  NsightEclipse.xml  matrixMul  matrixMul.cu  matrixMul.o  readme.txt
$ /usr/local/cuda/samples/0_Simple/matrixMul$ ./matrixMul
[Matrix Multiply Using CUDA] - Starting...
GPU Device 0: "Maxwell" with compute capability 5.0

MatrixA(320,320), MatrixB(640,320)
Computing result using CUDA Kernel...
done
Performance= 114.26 GFlop/s, Time= 1.147 msec, Size= 131072000 Ops, WorkgroupSize= 1024 threads/block
Checking computed result for correctness: Result = PASS

NOTE: The CUDA Samples are not meant for performancemeasurements. Results may vary when GPU Boost is enabled.
That’s it! I hope you manage to get CUDA up and running on your WSL2 distro. The only caveat is that you can’t run the samples that include OpenGL visuals since WSL2 doesn’t support it yet.
If you still have some energy left, keep reading for the optional steps.
Optional Steps
Writing your own programs
The CUDA samples also come with a template to help you start writing your own GPU programs.
$ /usr/local/cuda/samples/0_Simple/template$ ls
Makefile  NsightEclipse.xml  doc  readme.txt  template.cu  template_cpu.cpp
Using an IDE
One option is to use NSight Visual Studio Edition on Windows and open the code files stored in your WSL2 file system, but I find it boring.
I’ve decided to go with NVidia’s NSight Eclipse Edition running on WSL2. However, since WSL2 doesn’t officially supports GUI application I had to hack my way around it.
I’ve followed the instructions on this post to get Linux GUI apps to run on WSL2. Then, I’ve installed NSight with apt-get:
sudo apt-get install -y nvidia-nsightThen you can run NSight (make sure you have the X-Server up and running):
$ nsight
That’s all I had for today. Hope this post helps you get started with CUDA on WSL2. Let me know whether the instructions here work for you or not. Feedback is always welcome and feel free to report any mistakes or inaccuracies on this post.
